
macOS reinstallation: Bootable USB stick
Since version 10.8 (Mountain Lion), the Apple operating system macOS is only available via the Mac App Store. So when you buy a new Apple computer, macOS is no longer included on CD.
Current Macs are able to re-download the operating system directly from Apple servers and reinstall it. For this purpose, there is a recovery partition on the hard disk that can be used to repair the Mac. At startup, press and hold”Cmd-R” until the Apple logo and the rotating waiting circle appear.
If the recovery partition no longer exists (e.g. with a new hard disk), macOS Internet Recovery can still be used to reinstall macOS. However, if you own an older Mac or simply want to play it safe, you can create a bootable USB stick to recover/reinstall macOS.
Difficulty level:
Instruction
1. Fast USB stick
We need a USB stick to be used as a recovery medium. This stick should be at least 12 GB in size and have the fastest possible access times for a smooth installation (Tip: Transcend JetFlash 780, 16GB USB3.0).
2. Download macOS
To create the recovery stick, we need the installation file of macOS. You can find the current macOS “High Sierra” or the previous version “Sierra” for free in the Apple Appstore. Simply search for it using the search function and then download it. If the desired macOS version is already installed on the Mac, it can be found in the Appstore under “Shopping” and can be downloaded again.
Important: Once the download is complete, the installation starts automatically. This must therefore be aborted by closing the window.
3. Create bootable USB drive
With DiskMaker X a bootable USB stick can be created with a few clicks. An Internet connection is then no longer required for the “clean” installation (Clean Install) of macOS via USB stick.
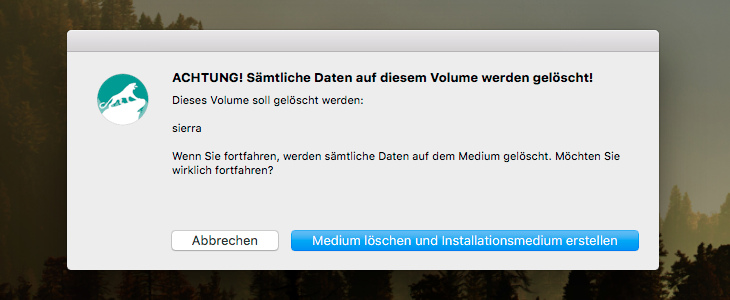
- Insert the USB stick (all data on it will be deleted!)
- Download, install and run DiskMaker X:
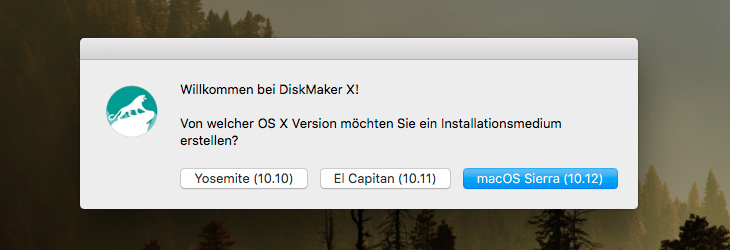
- Now we are asked which OS X version should be used for the boot disk.
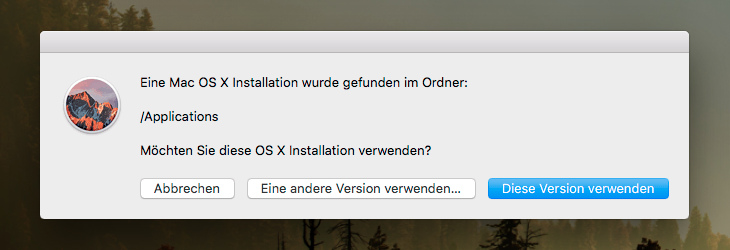
- Now DiskMaker X reports that it has found the installation file in the /Applications folder and wants to know if it should use it. Confirm this with”Use this version“.
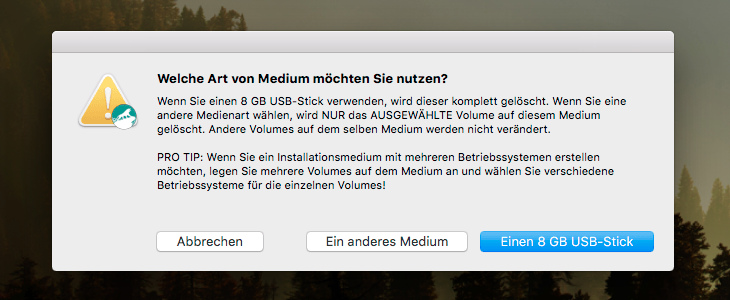
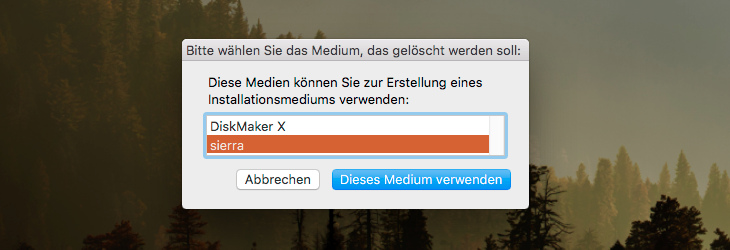
- DiskMaker X then asks for the disk. Click “8GB USB Stick” and select the stick from the list. The recovery stick is now created.
Rate this Post:

5.00/5 (1 votes)